Showing posts with label class. Show all posts

Monday, September 5, 2016

I Will Survive!

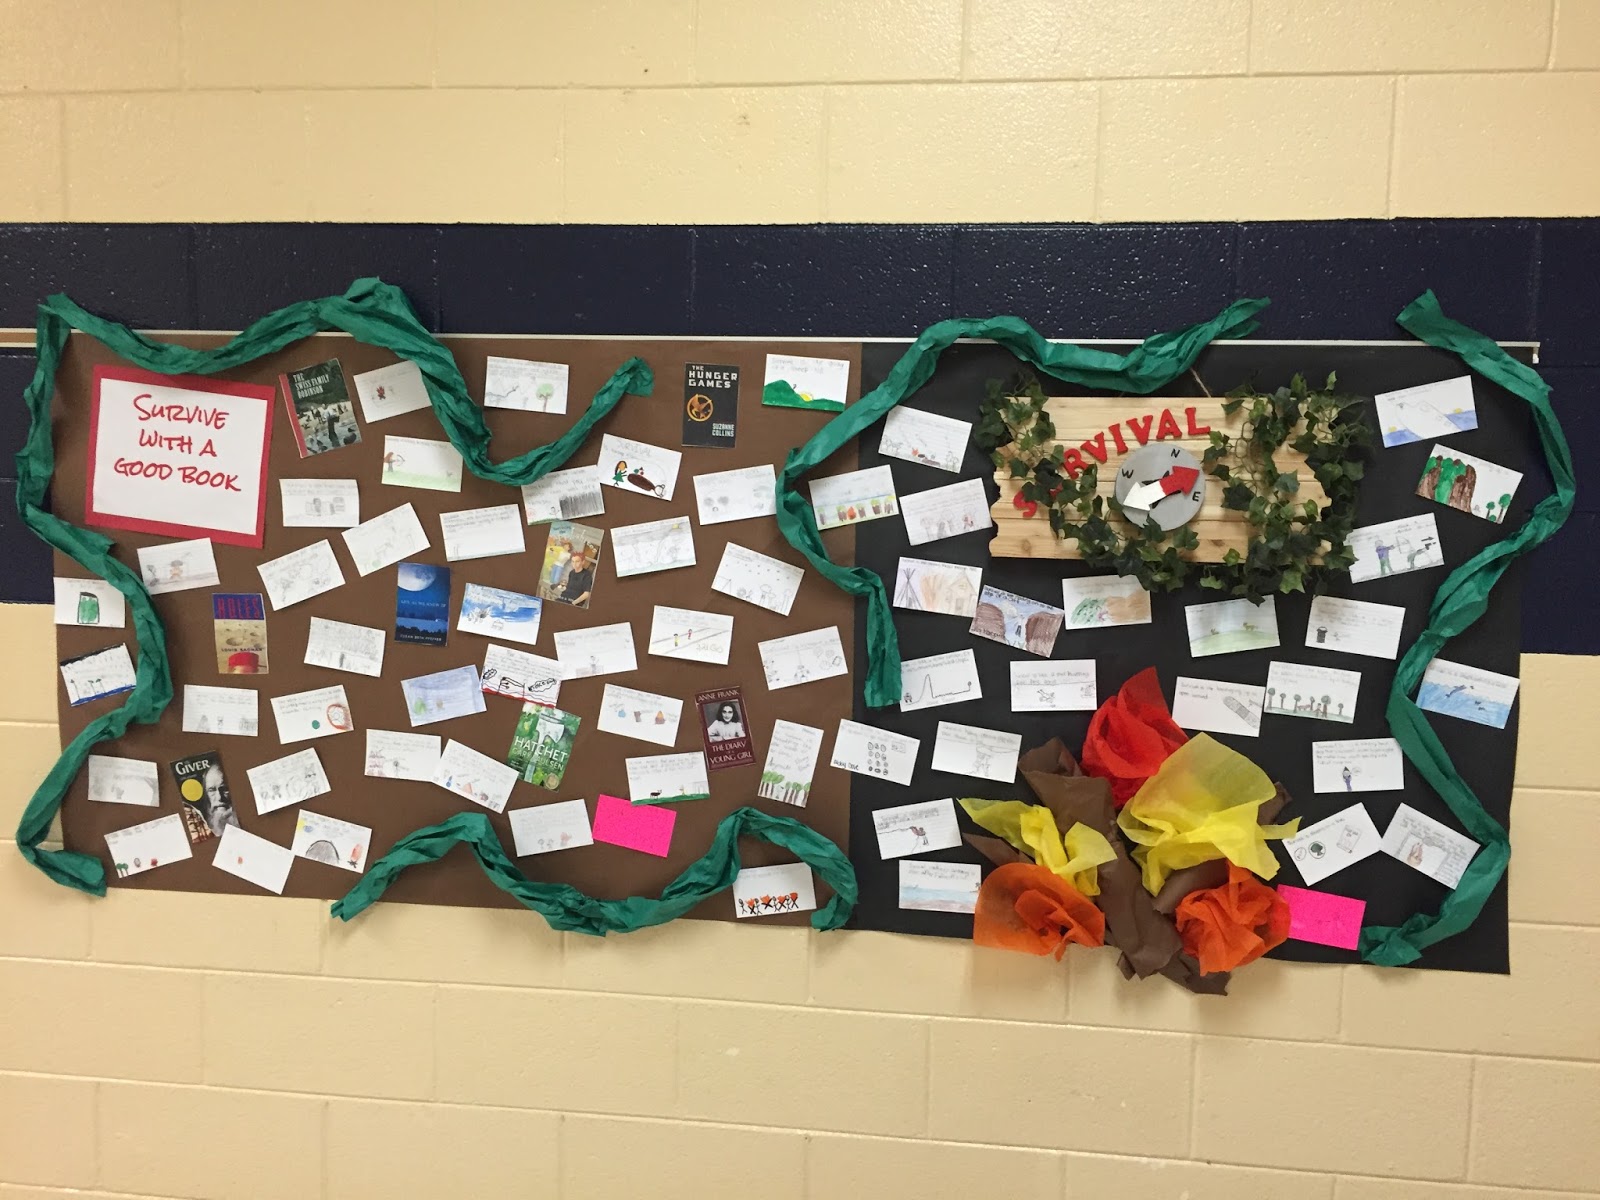
I teach each year in themed units, and my first unit of the year is always survival. Considering I teach in a sixth grade only school, just about everyone in the building is in survival mode for the first few weeks, so it's a pretty appropriate way to begin the year. 

Each of my units includes a PBL (more about that in a future post) and an Independent Novel Study. Before we get started with that, however, I have the students begin thinking about the unit theme in different ways. 

For my survival unit, I ask students to define and illustrate what they think it means to survive. My CP students write a definition, and my Honors students are asked to use a simile or metaphor to define survival. It always results in some pretty amazing thinking, and I can then use the students' work to create a display that will stay up for the entire unit. 


Sunday, August 30, 2015

Back to School - Superhero Style!

We are getting back in the swing of things, and I'm exhausted! A new schedule this year has my head spinning...We went from three 85 minute blocks and two preps to four 70 minute blocks and three preps. It's taking some getting used to!

Add this super exciting personal news, and a goal for a March wedding, and I am looking at a whirlwind of a year! (Isn't my fiance handsome!?)


Our theme at school this year is "Superheroes." We are going to have spirit days for teachers and students to wear their favorite Superhero gear. Our first Superhero Day was the third day of school. I have a navy skirt with white stars that I got for the Fourth of July. I really wanted to wear it as part of a Captain American outfit, but all of the Captain America shirts are blue and didn't match.

So, I did what I do best, and I made my own with a red t-shirt and some felt from Michael's! While I was wandering around Michael's I found a blue bow. I decorated it with some puff paint I had at home to add another touch to the costume! (The socks are from Target.)


I used a printed picture of Captain's shield to help me measure and cut out layers for my shirt. I hot glued the felt together, and then I used fabric glue to attach it to my shirt.


One of the other teachers on my team had the same Captain America idea!


Teachers ARE superheroes!


Sunday, August 2, 2015

Keeping It Organized

I think one of the best ways to love my students is by staying organized. I am a much better teacher when everything is in its place! Here are some simple ways I keep things in their place!

1. Here are my markers organized by color. I got the cups at the Dollar Store - 4 for $1! I then used Modge Podge to attach strips of scrapbooking paper around the tops!


2. My supply cabinet is my favorite place in my room sometimes. I love how organized and easy to find everything is! #TeamLabelEverything 


3. I always end up with leftover bulletin board letters that I don't want to throw away. I decided to use a shoe organizer to keep all the extras organized. It hangs on the inside of my supply closet.


Polished Look!

As seen in the pictures below, I'm nowhere near finished unpacking, organizing, and decorating my new classroom. Just a week away from teachers' return to school, I'm feeling that "back to school" overwhelming anxiety that I get every year.


To help combat that anxiety, I often find myself working on projects that aren't really necessities but give me a sense of accomplishment. One thing I did this week was put some border up on my walls. We have a long wooden strip that covers the length of one wall in our classrooms. I don't use it to hang anything, so I like to put border up to give the room a put-together look. Here are some before and afters...ignore the chaos everywhere else!


Side note - My back to school wreath found a perfect home between my windows!

If you take a closer look at the walls, you might notice that the left side also has some dowel rods held up by command hooks. I'm going to use them to hang anchor charts for each of my classes. I am going to connect the anchor charts to the dowel rods with metal book rings!


Patchwork Project

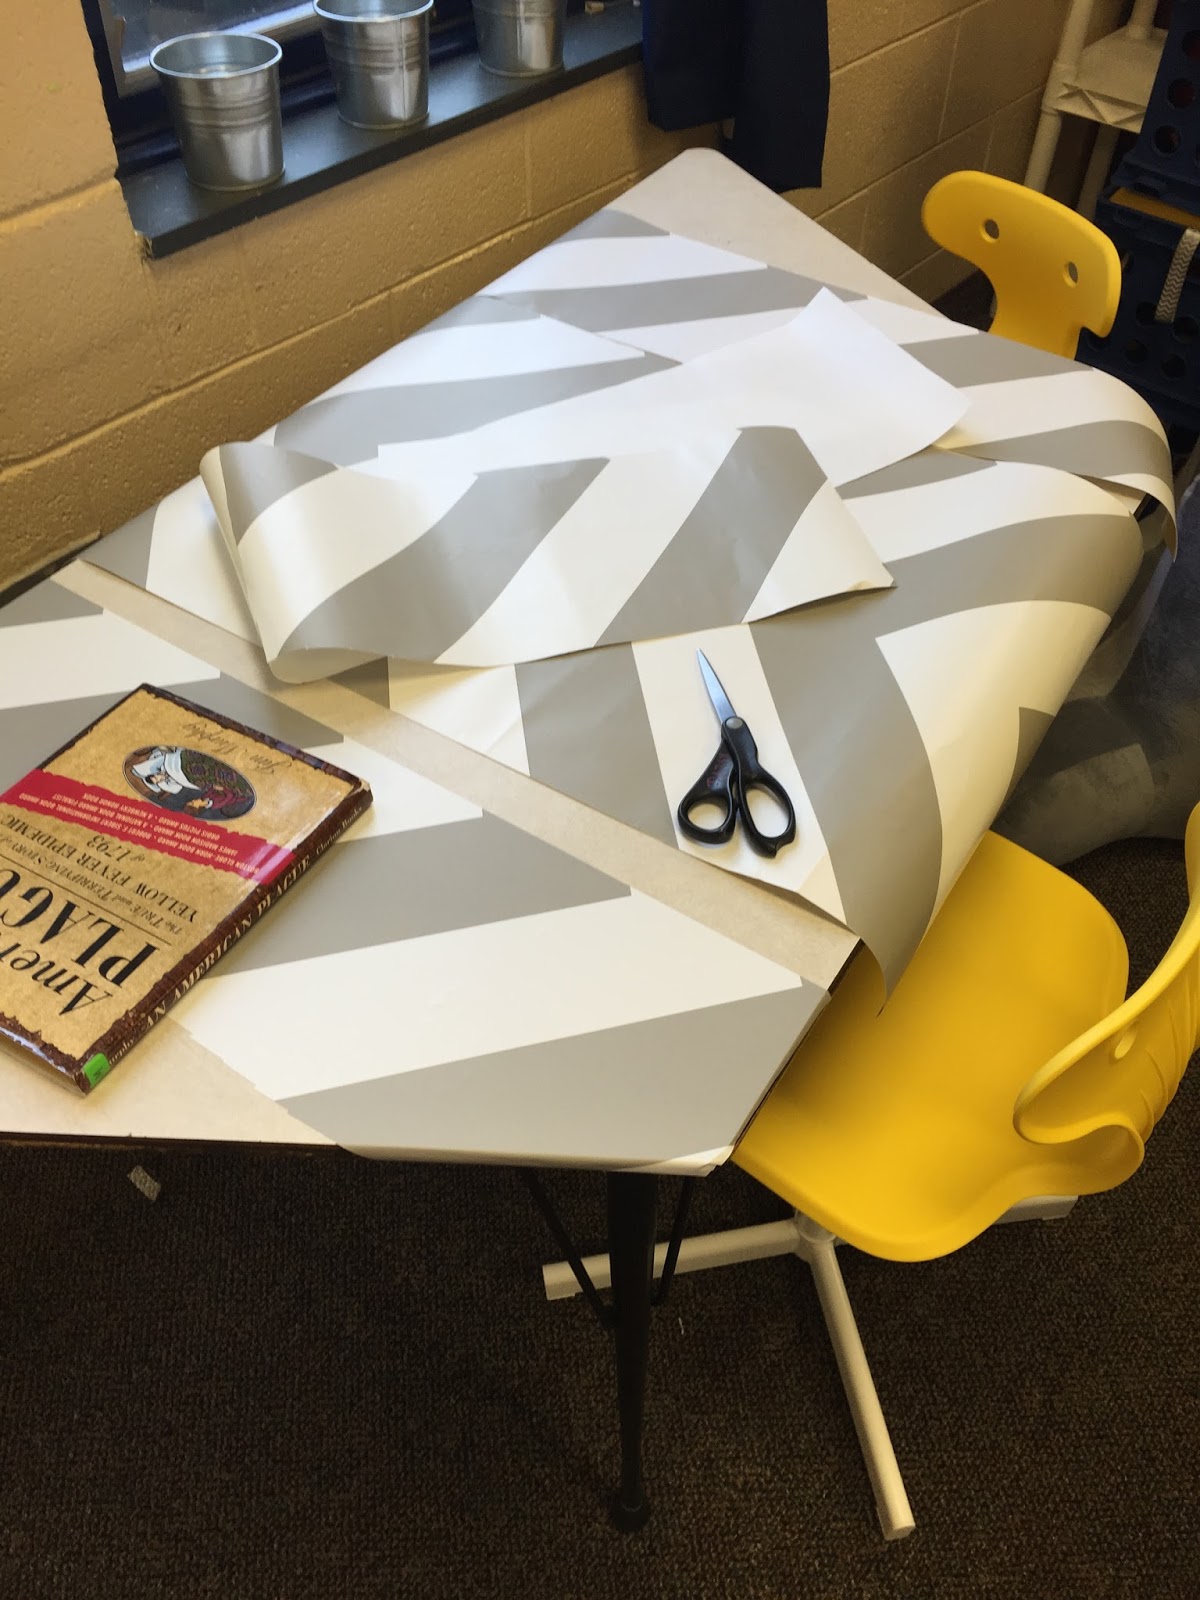
For Christmas last year, my dad gave me two bookshelves for my living room and some gray chevron wall paper from Target that I wanted to use to cover the backs of my shelves. It was so easy to do, and it turned out just how I pictured.


I had about half a roll and lots of scraps leftover, so I wanted to try to use it in my classroom. I decided to cover the tops of my two trapezoid tables to add some color to those dull tables.


Unfortunately, because I was patching scraps together, this project wasn't quite as easy as the bookshelves were, but I managed! 

I started by taking the largest pieces I had leftover and piecing them together on top of the table. I used a book and yard stick to help roll the paper out flat as I peeled off the backing. I still ended up with some bubbles, but it isn't too bad. 

Hint - Once you stick the wallpaper on, if there are bubbles, just roll with it. It gets way worse when you try to peel it back up and restick it. 


It isn't perfect, but I still love the way it turned out!


The only thing I wasn't super excited about was the look of the unfinished edges. (Ignore all those bubbles, ha!) 


To cover that up, I got some blue duct tape (only $2 with a 50% coupon from Michaels!) to place around the edges of the table. 


 I am so happy with the way it turned out!


Tuesday, July 28, 2015

Welcome Back!

I like to have a wreath on my classroom door for decoration and to add a bit of a home-y feeling. This year, I've decided to create wreaths for the door that match the unit of study we are doing (ex. our first thematic unit is on survival, so the wreath will be survival themed). I didn't want to leave out a more home-y (not to be confused with homie) bit of decoration, so I decided to create some wreaths to hang between my two windows in the classroom. I made the first one tonight!


I didn't take pictures while I was working on it (sorry!), but all the materials came from Michaels. The frame is a basic green metal wreath. I wove burlap and ribbon first and used brown pipe cleaners to attach the burlap to the frame. The wooden bus was already painted when I bought it, but I painted the wooden apple and added my name with a thin tipped paint pen. I painted the wooden letters and hot glued all the wooden pieces to the wreath. Simple! All in all, it took me about 30 minutes total to complete!

The "No Sew" Pillow

It's been a while since I've posted...but I'm back!

This year I've decided to remove all the desks from my room and embrace "alternative seating" options. I'll have a few tables with stools and fun chairs from Ikea, but mostly I plan to have low, small tables with crates and pillows. We'll see how it goes....I told my principal that my type A & OCD personality may absolutely hate it and need my desks back asap, but I wanted to give something new a try.

At the end of the year last year a coworker gave me two throw pillows she was getting rid of from her classroom. I figured I could give them a fresh look with some new pillow cases. With only (sigh) two-ish weeks until we're back in action, I decided to get going on the pillows.

I am NOT a seamstress by any stretch of the imagination, so when I saw these No Sew Pillows on Pinterest, I thought, "That can't be too hard!"

I found some fabric at WalMart that matches my color & pattern scheme (navy, yellow, gray, & chevron), and I guestimated that I'd need a yard for each pillow. Because the pillows have a dark and busy pattern on them already, I also got a yard of white for each pillow to act as a color buffer.


Hindsight is 20/20, and I should have measured the pillow and read the Pinterest directions a little more before heading to the store. Once I started folding the fabric per the directions, I realized a yard was not enough material. So, I had to do what all great teachers do - monitor and adjust! 

I first folded the pillow in the white fabric like I would wrap a present. Once that was folded, I placed it in the center of the chevron fabric. I folded the top and bottom of the chevron fabric to meet in the center of the pillow like shown above. 


Next, I folded the corners over like I do when wrapping a present. According to the directions I was attempting to follow, this would be the stage you bring both corners to the center to tie a knot. Unfortunately, my corners weren't long enough. 


I decided I could at least sew a button, so my "no sew" pillows became "almost no sew" pillows. I found these large wooden buttons at Michaels for .29 each. (P.S. They have a teacher discount and always have a great coupon on their app!) I painted them yellow and used them to connect each of the corners I folded into the center of the pillow. Just a few stitches, and I have two new pillows! 


Thursday, April 17, 2014

Twitter in the Classroom

Using social media safely in the classroom can be tricky, but it can also be very, very valuable. This year, I have implemented the use of Twitter in my room.

I wanted students to be able to concisely summarize text and identify story elements within texts. I also wanted to give them a way to create "teasers" for their favorite books. What better way to do this than through Twitter?

I knew I'd have to come up with a way to keep this safe for all of my students. I teach 6th grade, and the world wide web can be a scary place for young students. I decided from the beginning that I would control  our Twitter account, and my students (though many have their own accounts) would not be able to actually send the Tweets from our class account themselves.

After we read a text, I give my students a Twitter page handout (you can buy it on my TPT page here). Students then write their Tweets on the paper and turn them in. I choose the best ones and send them from our account. Then, I write the Tweets on laminated "Tweet sheets" using a Vis-a-Vis marker and post those on my classroom door. You can see some examples below. (These Tweet sheets are also on my TPT.)


It has worked like a charm this year. The kids love it, and it shows me so much about their understanding as we read!

Check out our Twitter account here!


Wednesday, April 16, 2014

The 4th Nine Week's Slump

No breaks from January to April. Testing, testing, & more testing. Warm sunshine & blue skies. The anticipation of those last few days of school. What do each of these have in common...?

They all play a part in the inevitable and dreaded "4th nine week's slump." By April of each year, I can pretty much count on lower grades, less motivation, and sky high energy among my students. This year I wanted to try something new to help combat the daily struggle that accompanies our dwindling days of school.

Our school is a data driven school, and our students love healthy competition. When thinking of what I could do to get the kids re-motivated, I knew I could use these aspects of CRMS to my advantage. When I recently visited my cousin's high school language arts class, an idea that incorporated data, friendly competition, and fun finally came to me!

I popped in to observe my cousin's classes on a day that he happened to be celebrating a recent high test average. When the class average on a test is a 90 or higher, he gives them a "trivia day." He develops a fun, educational trivia game, and the students are able to choose groups and play as a reward for their hard work on the assessment. I absolutely loved this idea, and I knew there was a way to incorporate it into my middle school classroom.

So, here's what I came up with: THE LEADERBOARD!


With this board, I'm keeping up with four things for each class. 

1. Current Class Average - Each time I add grades to the grade book, I update the new class average. (This is super easy with the PowerTeacher online grade book used by our district....all the numbers are crunched for you!) 
2. Class average on the most recent test/quiz - First, note that I don't use classwork or homework for this. I'd be changing it ten times a day! After entering grades for an assessment into my online grade book, I update the class average on the board. 

Notes: 
- I use three stars (first place, second place, and third place) as a visual for students to see which class average is in the lead. 
- At the interim and report card, the class with the highest average will win a trivia day. 
- I didn't want to give a trivia day every time a class made a 90 or higher average on an assessment because I felt that would take away too much instructional time. Instead, when a class gets a 90 or higher average on an assessment, they receive a half day word game day (such as Scrabble, Apples to Apples, etc.). 

Below, I've included a close up picture of one class:.


3. The top three highest averages for each class - I don't list the actual average, I just list the names of the students with the highest three averages in the class. 
4. Honorable Mention - I give honorable mention to the student who raises his/her grade the most between assessments. (ex. Student A scored a 60 on last week's quiz but made a 100 this week. She increased by 40 points - more than anyone else in the class!)

Notes:
- If more than one student has the same average (ex. 3 of my students have 100 averages), I let them tie for first place. 
- At the interim and the report card, the top three students will receive the opportunity to exempt a quiz, classwork, or homework assignment of their choice. 
- There is no reward for the honorable mention, but I am finding that the students who appear here usually don't appear in the other slots. They are SO proud to have their name on the leader board; it really works to motivate them to continue raising their grades. 

Below, I've included a close up picture of one class:.


We've only been using it a few weeks, but so far it's working like a charm. Not only are my students motivated, they are feeling a sense of responsibility for their participation and effort as members of a class. All of my classes have improved their averages, and for the first time in a while, I'm seeing them really put effort into studying!