Showing posts with label read. Show all posts

Monday, September 5, 2016

I Will Survive!

I teach each year in themed units, and my first unit of the year is always survival. Considering I teach in a sixth grade only school, just about everyone in the building is in survival mode for the first few weeks, so it's a pretty appropriate way to begin the year. 

Each of my units includes a PBL (more about that in a future post) and an Independent Novel Study. Before we get started with that, however, I have the students begin thinking about the unit theme in different ways. 

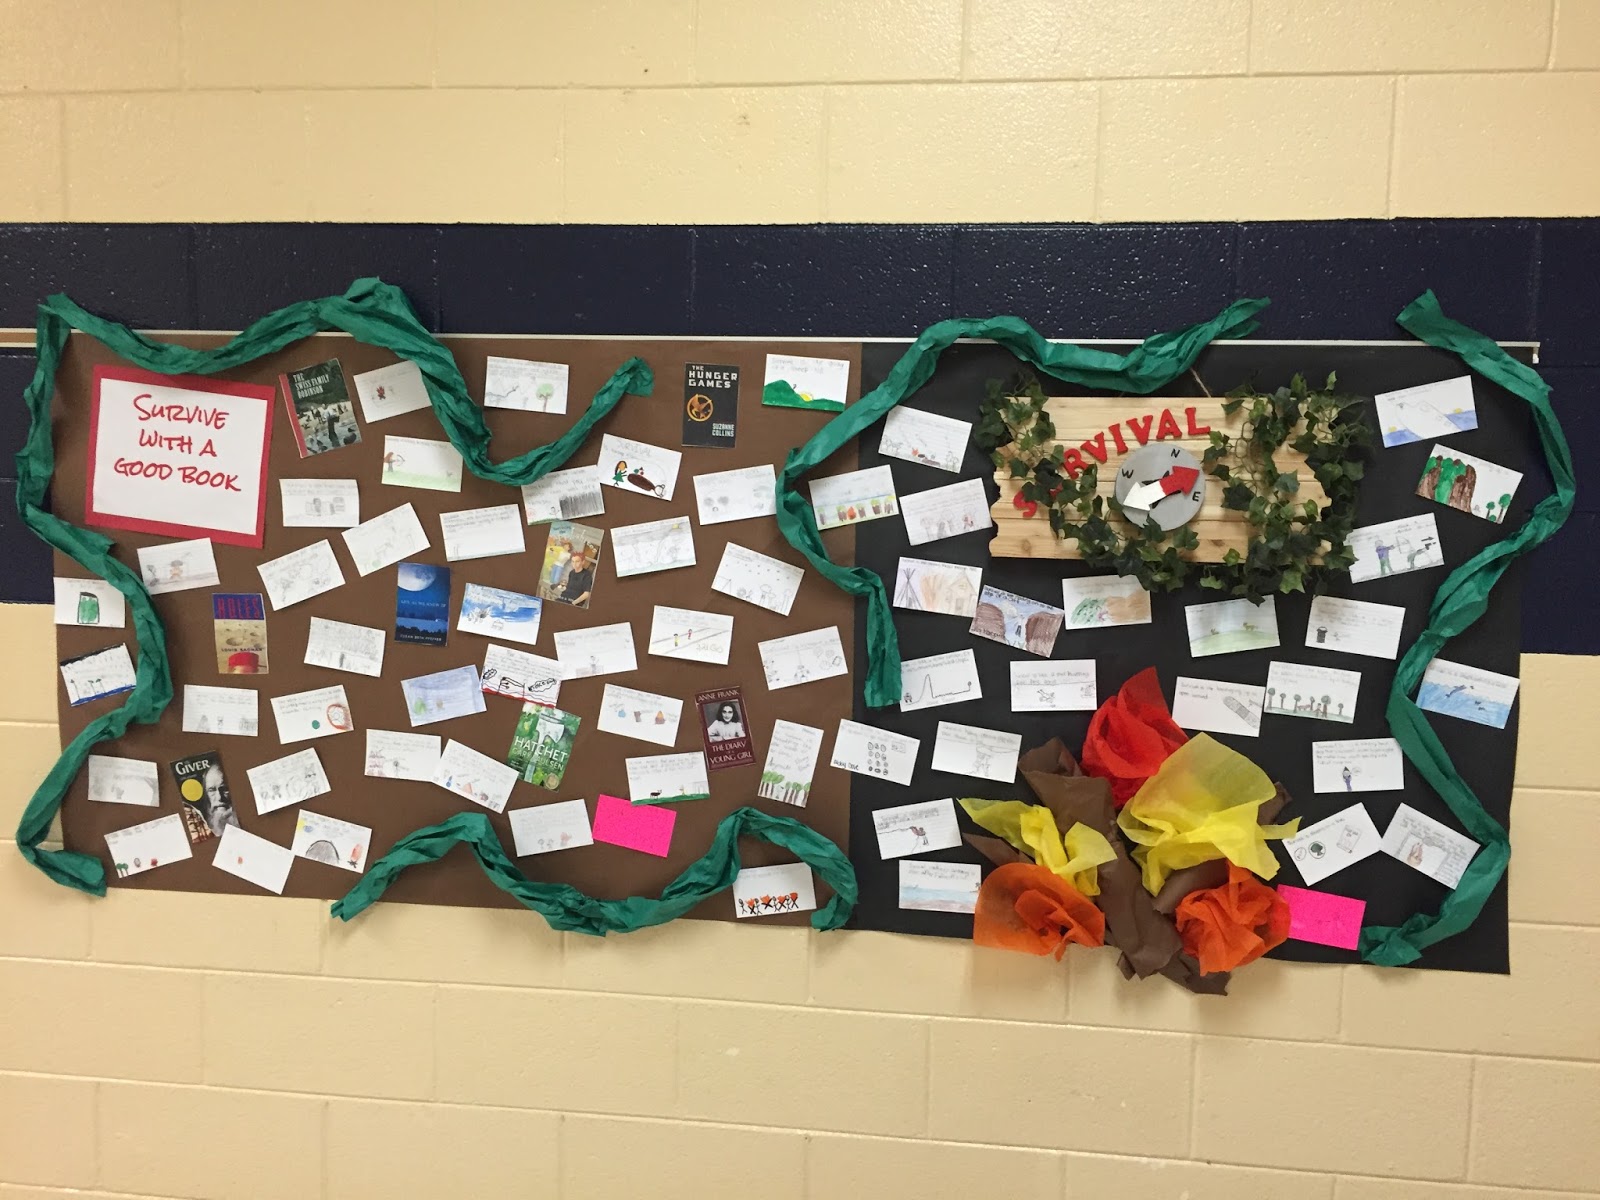
For my survival unit, I ask students to define and illustrate what they think it means to survive. My CP students write a definition, and my Honors students are asked to use a simile or metaphor to define survival. It always results in some pretty amazing thinking, and I can then use the students' work to create a display that will stay up for the entire unit. 


Tuesday, August 23, 2016

Minimize "Stuff" to Maximize the Learning Environment

It's that time again - BACK TO SCHOOL! I'm already a week behind on the blog...there is no busy like back to school busy, and no tired like back to school tired. :)

I thought I'd start the year with a tour of my classroom. I am never satisfied with how my room looks. Every single year, I change at least one thing. This year, however, I made some BIG changes. We are only four days in, but so far, I'm loving it!

Here is a "big picture" picture of most of my room.


Things I loved and kept the same from years past: 

1. The Leader Board - You can read about the Leader Board on my "The 4th Nine Weeks Slump" post.

2. The bathroom/water/locker check-out system - I can't believe I've never done a post on this! It's definitely one of my very favorite things in my room, and it tops the list on classroom management priorities.

All of the classrooms at CRIS have four large metal cabinets in the back of the room. They aren't super attractive, but they do provide a lot of storage - and a lot of space for decorating. A few years ago I realized I needed a new system for how my kids left the classroom. I was encountering so many problems - the kids who wanted to leave seventeen times in one block, the kids who would just walk up to me in the middle of my lesson to ask to go to the bathroom, the kid who left his homework in his locker every single day...the list goes on and on. After much brainstorming, I decided to put those cabinets to work as my bathroom management system.

This is what the cabinets look like:


There is one cabinet for each block. I separated each block into three sections.

1. The student names - I printed each student's name and had them laminated. I then hot glued a magnet to the back of each name.

2. The "I'm Out" section - When a student needs to leave the room, he/she finds his/her magnet and moves it to this section.

3. The "I'm Back" section - When a student returns from the restroom/locker/water, he/she moves his/her magnet to this section.

The rules I go over with the students are:

1. You may only leave the classroom one time per block. So, if you need to get your homework out of your locker, you better go to the bathroom while you're out! Once your name tag is moved into "I'm Back," you can't leave again.

2. Only one boy and one girl are allowed out of the room at one time. So, if Suzy Q's tag is in "I'm Out," then Brenda Jo has to wait until she gets back.

This process has been simple and absolutely seamless. I was almost surprised and a little wary of how well it worked when I first implemented it. So far, it hasn't failed me!

3. The Supply Cubby - When I taught elementary school, I had one of my friend's dad build me a shelving unit for all of my construction paper. When I moved to middle school, I didn't really need a home for construction paper, but I didn't want to lose the shelving unit. I decided to re-purpose it into a supply cubby system. I purchased some great tubs from the Dollar Tree and filled them each with some frequently used supplies (dry erase lap board, rag for erasing, Expo marker, ruler, scissors, glue, clipboard, etc.). When we are working on a project, I have students grab a tub (they are numbered, so students grab the bin that corresponds with their number). I don't waste time passing out materials, and students don't have to fuss with pulling everything out of their book bags.


4. Homework & Objectives Board - I teach two intervention classes and two honors classes, so I split the white board in the back of my room into two sections. On the left side, I include homework, reminders, daily focus questions, and weekly learning intentions for my intervention classes. On the right side, I include the same for my honors students. It's great to have a central location for all the "need to know" information for both sets of classes.


5. Anchor Charts - I love having a place to hang the anchor charts for each of my classes. You can check out how I made those on my "Polished Look" blog.


Things I changed for this year:

1. NO DESKS! - My biggest change for this year is that I got rid of all the desk in my room - including my teacher desk. It was a huge leap, but so far, I love it! (And the kids seem to love it too!)

Because I teach two intervention classes, I really needed a comfortable space for small group instruction. I knew that if I added a horseshoe table or something similar, I'd need to make space somewhere. The teacher desk had to go. Once it was out, I had so much more room. I scrounged up three trapezoid tables to create my own version of a horseshoe table. One of the tables serves as my "desk," and the other two provide plenty of room for small groups. It's perfect. I added a little fabric fringe, and it's really become a functional and welcoming space.


I also am a huge fan of alternative seating in the classroom. Last year I went half and half - I kept about 13 desks, and I used tables, floor seating, yoga balls, etc. for the other half of the seats. This year, I used my state teacher money to purchase six new tables (Thank you, Ikea!) for my room. I was able to get rid of all of the traditional desks, and I used stools and chairs that I had last year for table seats. I have gotten nothing but compliments from the kids so far, and the tables are PERFECT for group work. 


2. Minimize "stuff" to maximize the learning environment - I am a typical teacher hoarder. I keep everything; I accept every free book, ruler, pack of pencils, etc. anyone ever offers me. Last year, I was up to EIGHT full bookshelves of books. Maybe twenty percent of those books ever got picked off the shelf. So, I purged. I (along with my husband, Ian and my best friend, Lisa) spent several days getting rid of "stuff." We donated books, cleaned out file cabinets, and passed along supplies of which I had an abundance. If I couldn't remember the last time I used it, I got rid of it. My goal this year is to truly minimize in order to maximize the space and time we have for learning. 

Here is my new reading corner - about five bookshelves less than last year!


One of the things I love most about my profession is that it constantly changes. Each year I get a new classrooms of students with a unique set of needs. Every year is different; every day is different. I work in a school that encourages and embraces risk taking. My administrators love when we try something new - even when it doesn't quite work like we planned. I am so thankful to be here, and I know it's going to be a great year!



Thursday, April 17, 2014

Twitter in the Classroom

Using social media safely in the classroom can be tricky, but it can also be very, very valuable. This year, I have implemented the use of Twitter in my room.

I wanted students to be able to concisely summarize text and identify story elements within texts. I also wanted to give them a way to create "teasers" for their favorite books. What better way to do this than through Twitter?

I knew I'd have to come up with a way to keep this safe for all of my students. I teach 6th grade, and the world wide web can be a scary place for young students. I decided from the beginning that I would control  our Twitter account, and my students (though many have their own accounts) would not be able to actually send the Tweets from our class account themselves.

After we read a text, I give my students a Twitter page handout (you can buy it on my TPT page here). Students then write their Tweets on the paper and turn them in. I choose the best ones and send them from our account. Then, I write the Tweets on laminated "Tweet sheets" using a Vis-a-Vis marker and post those on my classroom door. You can see some examples below. (These Tweet sheets are also on my TPT.)


It has worked like a charm this year. The kids love it, and it shows me so much about their understanding as we read!

Check out our Twitter account here!


Wednesday, April 16, 2014

The 4th Nine Week's Slump

No breaks from January to April. Testing, testing, & more testing. Warm sunshine & blue skies. The anticipation of those last few days of school. What do each of these have in common...?

They all play a part in the inevitable and dreaded "4th nine week's slump." By April of each year, I can pretty much count on lower grades, less motivation, and sky high energy among my students. This year I wanted to try something new to help combat the daily struggle that accompanies our dwindling days of school.

Our school is a data driven school, and our students love healthy competition. When thinking of what I could do to get the kids re-motivated, I knew I could use these aspects of CRMS to my advantage. When I recently visited my cousin's high school language arts class, an idea that incorporated data, friendly competition, and fun finally came to me!

I popped in to observe my cousin's classes on a day that he happened to be celebrating a recent high test average. When the class average on a test is a 90 or higher, he gives them a "trivia day." He develops a fun, educational trivia game, and the students are able to choose groups and play as a reward for their hard work on the assessment. I absolutely loved this idea, and I knew there was a way to incorporate it into my middle school classroom.

So, here's what I came up with: THE LEADERBOARD!


With this board, I'm keeping up with four things for each class. 

1. Current Class Average - Each time I add grades to the grade book, I update the new class average. (This is super easy with the PowerTeacher online grade book used by our district....all the numbers are crunched for you!) 
2. Class average on the most recent test/quiz - First, note that I don't use classwork or homework for this. I'd be changing it ten times a day! After entering grades for an assessment into my online grade book, I update the class average on the board. 

Notes: 
- I use three stars (first place, second place, and third place) as a visual for students to see which class average is in the lead. 
- At the interim and report card, the class with the highest average will win a trivia day. 
- I didn't want to give a trivia day every time a class made a 90 or higher average on an assessment because I felt that would take away too much instructional time. Instead, when a class gets a 90 or higher average on an assessment, they receive a half day word game day (such as Scrabble, Apples to Apples, etc.). 

Below, I've included a close up picture of one class:.


3. The top three highest averages for each class - I don't list the actual average, I just list the names of the students with the highest three averages in the class. 
4. Honorable Mention - I give honorable mention to the student who raises his/her grade the most between assessments. (ex. Student A scored a 60 on last week's quiz but made a 100 this week. She increased by 40 points - more than anyone else in the class!)

Notes:
- If more than one student has the same average (ex. 3 of my students have 100 averages), I let them tie for first place. 
- At the interim and the report card, the top three students will receive the opportunity to exempt a quiz, classwork, or homework assignment of their choice. 
- There is no reward for the honorable mention, but I am finding that the students who appear here usually don't appear in the other slots. They are SO proud to have their name on the leader board; it really works to motivate them to continue raising their grades. 

Below, I've included a close up picture of one class:.


We've only been using it a few weeks, but so far it's working like a charm. Not only are my students motivated, they are feeling a sense of responsibility for their participation and effort as members of a class. All of my classes have improved their averages, and for the first time in a while, I'm seeing them really put effort into studying!


Friday, July 20, 2012

Reader's and Writer's Pledge

Our school uses the Balanced Literacy model for language arts, and I love, love, love my reader's and writer's workshop time every day. Last year, I noticed that many of my students came in not believing they were or even could one day be readers and writers. To help combat those attitudes and instill confidence in all of my students as readers and writers, I developed a pledge for both reader's and writer's workshop. These hang in my reading corner, and a different student leads us in the pledges each day before workshop time!


Reader's Pledge


I am a reader.

I am capable and smart.

I do not study how an author writes; I participate in his or her writing.

I will learn to be a better writer as I read more.

I will learn to be a better reader as I read more.

I will read like I am a writer.

I know that reading is important.

I value the opportunity to read.

I respect other readers.

I take advantage of the time I get to read.

I am a reader.


Writer's Pledge


I am a writer.

I am capable and smart.

I will write like a reader. 

I will learn to be a better writer as I write more.

I will learn to be a better reader as I write more.

I know that writing is important.

I will write with my heart first.

I respect those who will read my work and take the time to make my writing beautiful.

I value the opportunity to write.

I respect other writers.

I take advantage of the time I get to write.

I am a writer.

Monday, July 16, 2012

Organizing Your Classroom Library

Organizing your classroom library can be a daunting task - especially if you have a lot of books! I know many teachers who are continuously frustrated because books are never returned to their homes and can't be found when they are needed. I also know teachers who start the year organized and excited about their library, but find their system difficult to maintain. Luckily, the organization of my classroom library is one of the things I seemed to get right when I began teaching, so I thought it'd be an excellent place to start my sharing of ideas! 

First let me say that setting up this system did take time. I spent many hours the summer before my first year teaching cataloging books, labeling books, and organizing books. I am SO thankful that I spent that time, however, because my books stay organized, and I always know where to find them when a student has a request!

Hopefully, this blog will inspire you to get organized, too! 

1. Catalog Your Books

The first thing I did was make an Excel Spreadsheet listing all of my books in alphabetical order by author's last name. (Side Note: If I had been more Google Apps friendly when I began, I would have used Google Spreadsheet to do this. I love everything about Google Docs, and I highly recommend the tool!) In my spreadsheet I have listed the author, book title, and subject matter of each book. I also have listed the grade level appropriateness, how many copies of each book I have, and the name of the book bin the book will be organized in. I add to this list as I buy new books, and I don't put a book in my library unless I have first cataloged it! 

If you have a lot of books, this is going to be the most time consuming part of your organization, but it is crucial. When a student asks you for a specific book all you have to do is pull up your log, press "Control + F" on your keyboard, and search for the book! You then can check what bin it is located in and help your student find the book. I also love having the subject matter listed because it helps me find books I don't even remember I have. For example, I pull up my log and search for "World War II" when it's time to teach WWII, and every book I have on the subject comes up! What takes a while to do in the beginning becomes a huge time saver in the end!


Here is a screen shot of a portion of my book log...just click it to enlarge!


2. Label and Organize Your Books

You have to decide what categories of books you want to have in your classroom library. I use the following system: 


Each genre of book has a specific label. I used Dollar Store baskets to create bins for the genres. On each bin, I used laminated index cards and book rings to make a label. I put the sticker signifying the genre on each label, and then every book that goes in that bin will also have that sticker. At the beginning of the year I teach kids to match the sticker on the book to the sticker on the label of the bin! It works like a charm! Here are some pictures of my library to help you really see what it looks like!

Biography = red star     

These are any books that fall into the category of biography.
 

Non-Fiction = yellow star

These are any books that fall into the category of non-fiction. I also include autobiography here.


Fiction = green star

These are any books that fall into the category of fiction. I have more of these baskets that any other! (Side Note: If I have multiple books by one author, I organize those into an author study bin. If the fiction book is part of a series, I organize those into a series bin. Class sets and books considered to be classics are also in separate bins.)


Mystery = silver star

These are any books that fall into the category of mystery.


Poetry = yellow circle

These are any books that fall into the category of poetry. 


Historical Fiction = pink circle

These are books that fall into the category of historical fiction. 


Reference = green circle

These are books that are considered reference. I have separate bins for dictionaries, encyclopedias, almanacs, etc. They all have the same green sticker, but their labels have different names. 


Books in a Series = orange rectangle

These are any books that are part of a series. All books in a series have an orange rectangle, but I differentiate the series by creating a special label for each series. For example, Harry Potter books are abbreviated with an HP. Each book in the series has an orange rectangle with an HP, and the bin for the series also has an orange label with an HP. 


Author Study = green rectangle

When I have multiple books by one author, I create author study bins. All author study books have a green rectangle, but I differentiate by creating a special label for each author. This special label is usually the author's initials. 


Classics = yellow rectangle

These are books that are considered classic literature. 


Classroom Sets = pink rectangle

When I have a classroom set of books, I keep them in a larger bin separate from my other books. I use pink rectangles on these books, but I number each book in the set. Because each student in my class has a number, numbering the books helps me keep track of them when we use them. Student number one receives book number one, etc. I always know which students have the missing books when we are done using them!


Here are some pictures of the complete library! (Please excuse the mess in the background! The library is just about the only thing ready in my room right now!)


 I keep my read aloud and picture books separate from the chapter books. They are organized by subject (Language Arts, Math, Science, Social Studies, and "Read Aloud" books (feel good books or books that don't otherwise have a specific subject correlation). I am lucky to have two tier shelving for each of these categories, so I keep my related professional texts on the top shelf, and the read alouds on the bottom shelf! The past couple of years I have left these shelves open, but this year I am going to make curtains to cover them up. I'll post pictures of those when they are done, but here is what they look like for now!

 Read Aloud = blue star


Well, that's it for my classroom library! I hope you found this helpful and are ready to get organized!